

In this article I will overview how to setup a custom connector and create a flow that will export a report and email it as a PDF file. This functionality requires administrative rights that will require an Azure AD or Global Admin to apply.
These are the steps required for this exercise
- Setup the necessary App registration in Azure AD
- Create the custom connector using the Power BI API
- Deploy the flow with the connector and associated steps required to mail the resulting PDF export
Step one: App registration for Government Community Cloud
In order to leverage the API for Power BI, you need to create the necessary registration for the specific government API permissions. While you can attempt to do this manually, the best approach is to use our app registration tool for government embedding as it essentially creates the necessary permissions for using the API.
Browse to https://app.powerbigov.us/embedsetup/AppOwnsData and provide your administrative credentials. Select Next and select Read all datasets and Read all reports

You can skip creating a workspace and importing content for this exercise. You will be asked to Consent on behalf of your organization when Granting Permissions.

We now have to add a Redirect URI and create a Client Secret in Azure AD. Login to https://portal.azure.com/ using your admin account and add the following URL to the App registration you created in the previous step:
https://power-apis-usgov001-public.consent.azure-apihub.us/redirect

Then create a Client Secret and make sure to record this as it can only be done once
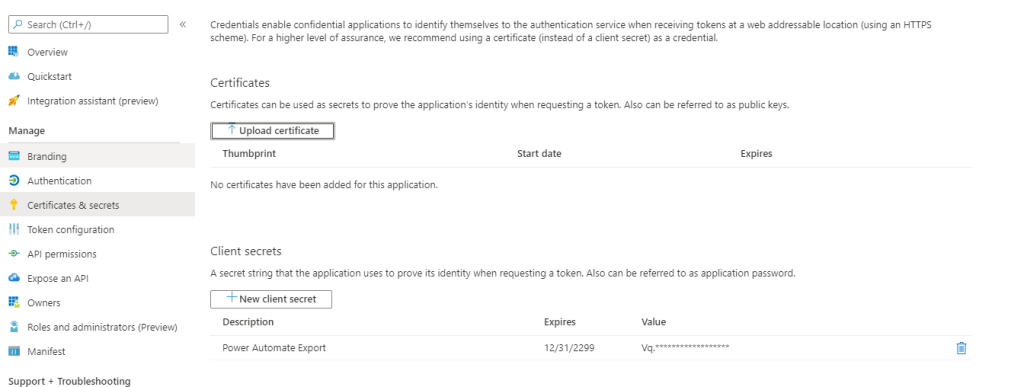
You will need the App ID and the Client Secret for the next step in creating the custom connector for Exporting a report to PDF
NOTE: be aware that for leveraging the API in government you are required to use the Microsoft Power BI Government Community Cloud permission and not the standard Power BI Service API which is typically why most people have trouble using the API in the Microsoft government cloud.
Step Two: Create the custom connector using the Power BI API
For the next two steps of this article, you can download the necessary Zip files with the custom connector definition and flow import package here:
https://www.linkedin.com/smart-links/AQH6oyP8uhvw3A
Be aware you will also be required to have a paid plan that includes Premium flow connectors
As a government customer, you will first browse to the government url for Power Automate https://gov.flow.microsoft.us/
First you need to create a custom connector:
- In Power Automate go to Custom connectors (left sidebar under Data)
- Choose “New custom connector” -> Import an OpenAPI file
- Choose a name to your connector, and import the attached PowerBI-ExportTo-API-fairfax-custom-connector.swagger.json
- Now edit the custom connector:
- General page – no need to change anything. Make sure Host is set to “wabi-us-gov-iowa-redirect.analysis.usgovcloudapi.net”

- Security page – here you should see that OAuth2.0 and Azure Active Directory are chosen. You have to fill:
- Client Id – the ID of the App you’ve created
- Client Secret – your App’s secret
- Resource URL – https://analysis.usgovcloudapi.net/powerbi/api

- Definition page – no change is needed
- Choose “Create connector”
- Test page – can be used to test the custom connector
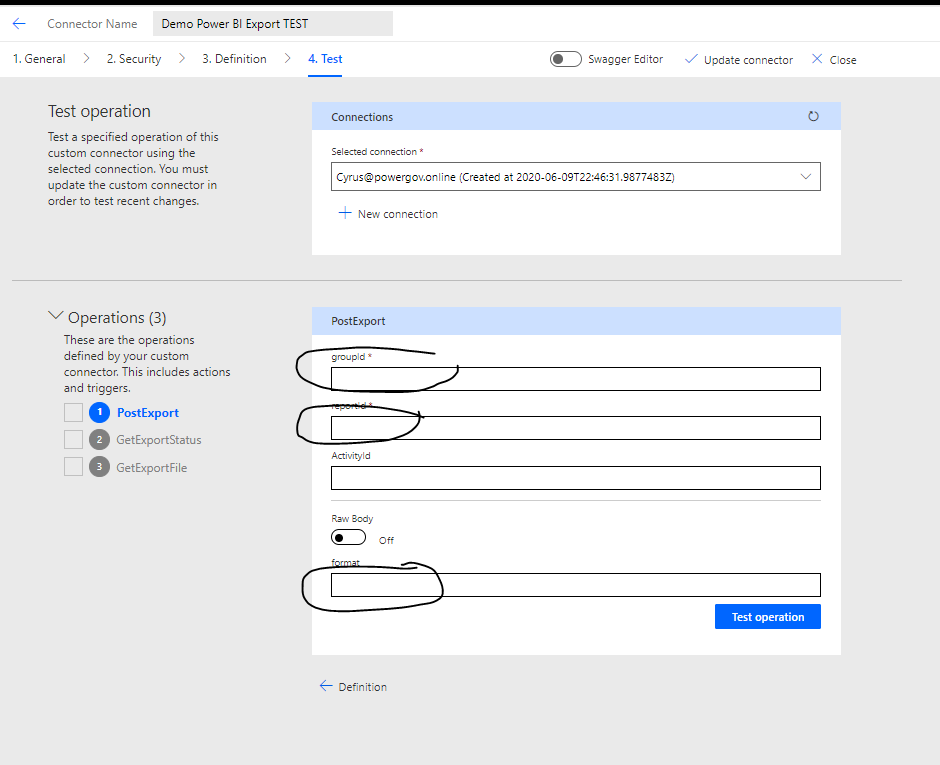
- Create a connection using the PowerBI user who owns the report. You will be promoted to provide credentials to create this connection. If there are issues with authentication you may get an error or the connection will not create as expected.
- Fill the group ID (report’s workspace ID) and report ID (Activity ID can remain blank), type PDF in the format. The Group and Report ID will be the URL GUIDS when browsing to your report in Power BI.
- Press “Test operation”. If you get a response with “202” status, it means the export started running
- General page – no need to change anything. Make sure Host is set to “wabi-us-gov-iowa-redirect.analysis.usgovcloudapi.net”
Step Three: Deploy the flow with the connector
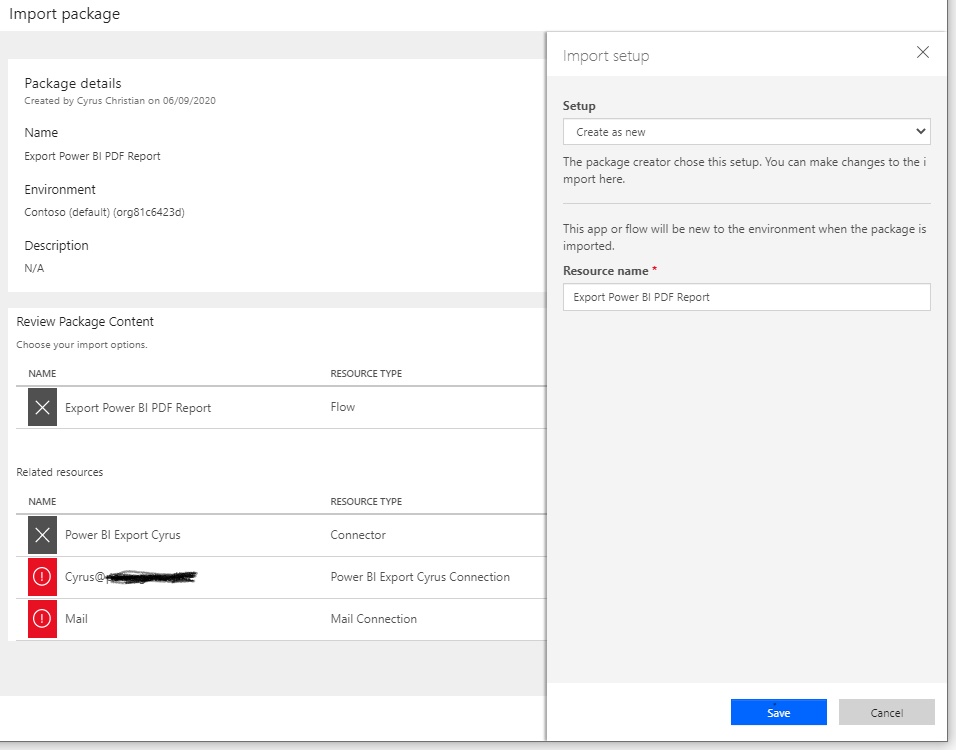
The last part of this exercise will require importing the zip file ExportPowerBIPDFReport and creating the flow using the custom connector. Head back over to Power Automate https://gov.flow.microsoft.us/ and select My Flows and use the +Import button to upload the zip package file that has been provided.
You will be prompted to wire up the import to our environment as seen below. Give this flow a name as appropriate to your needs.
Wire up the flow to the custom connector you created in step two.

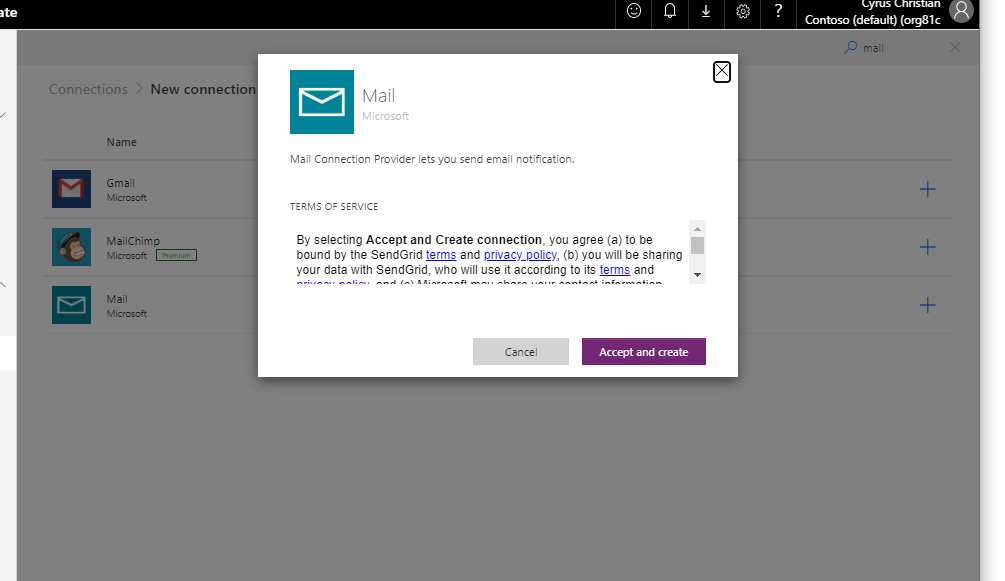
Create a Mail resource connection if one doesn’t exist already.
Your final step should be fully connected and ready to import
Finally add your Report and Group GUIDS from your Power BI Report URL.


Lastly, update the email you wish to send your Report Export as a PDF

Test your flow and verify it completes. Be aware there is a DO until statement that will wait until the response form the API that the file is ready returns success.

This pattern of using the API for Power Bi can be used in a multiple of use cases and I hope this helps any of our government customers use these products in more complex and automated use cases.
Feedback appreciated!
